About Custom Interaction Attributes
Custom interaction attributes allow customized data to be attached to interaction data and viewed in Reporting. Each custom attribute can be displayed in its own column on the report, by attribute name, with the attribute values shown in the rows below it. For example, if a flow is configured to collect a customer's account number, you can use custom interaction attributes to view this customized information in Historical and Realtime Reporting.
When running a report in Reporting > Historical Reporting > Analysis, your custom attributes can display by individual columns in the Interaction Detail by Queue and Interaction Detail by Agent reports. To display these attributes in Reporting, ensure the flow is updated with the new flow notation Assign Interaction Attribute found in the Flow Designer under Data Exchange.
In Realtime Reporting, enabled custom interaction attributes can be viewed in the Standard Interactions in Queue Table.
Note: You can add up to ten custom attribute columns to an interaction report.
Adding a Custom Attribute To an Interaction Report
-
Go to Reporting > Historical Reporting > Analysis.
-
From the Select Data drop-down menu, select the interaction report with which you want to work, Interaction Detail by Queue or Interaction Detail by Agent.
-
Below the list of available report information, click the Select Data arrow and choose the appropriate Custom Attributes option from the list that pops up, Interaction Detail by Queue > Custom Attributes or Interaction Detail by Agent > Custom Attributes > Custom Attributes.
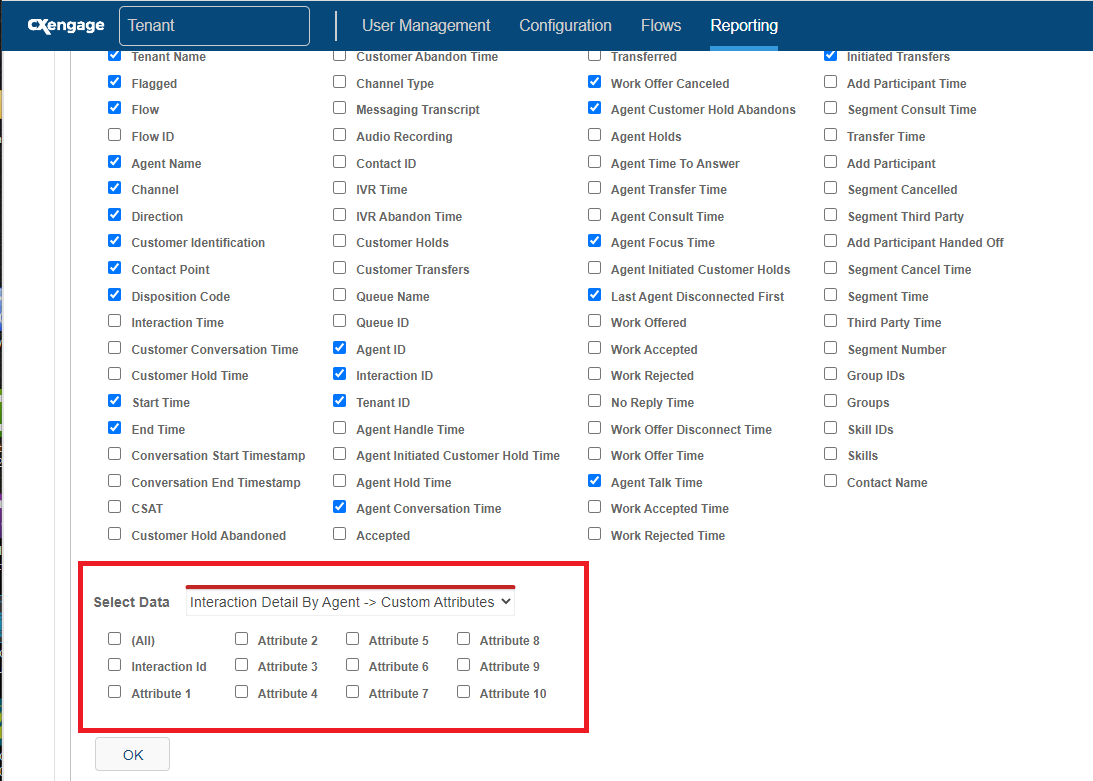
Ten general attributes display. You will map your information to these attributes.
-
At the top of the page, click the Set Custom Attributes button.
On the Custom Attributes dialog, associate a general attribute, Attribute 1, Attribute 2, etc., with your existing information.
-
Check one of the ten attribute boxes, and then click the Select an attribute arrow next to it.
-
From the list, select your existing custom attribute.
-
Continue to check a box and select an attribute for each column you want shown on the report.
-
Click Apply to add your customized attributes to the interaction report details.
At the bottom of the page, notice that the Attributes you mapped reflect the name of your information rather than the general attribute name.
-
Check the box next to each attribute name you want to add to the report as a column.
-
Click the OK button, and the report displays columns for your existing attributes.
